
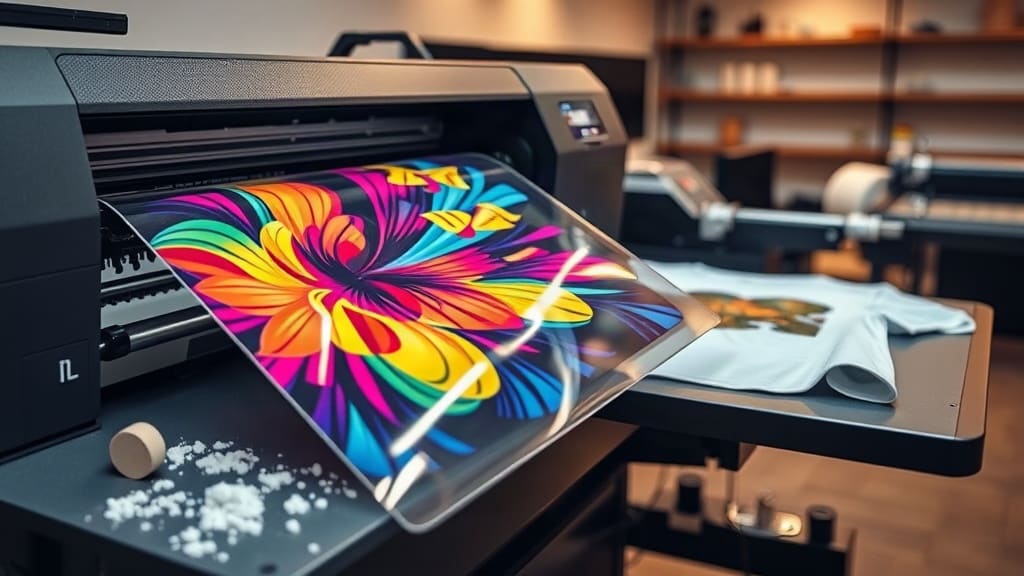
If you’ve been exploring custom apparel decoration, you’ve likely stumbled upon the term DTF. DTF, or direct-to-film, is a printing method that has taken the industry by storm. I remember when I first tried it in my own workshop; the ease of transferring vibrant designs onto various fabrics without weeding was a game changer. In this guide, I’ll walk you through the ins and outs of DTF printing, from the basic process to advanced tips that will save you time and money.
What Is DTF Printing?
DTF stands for direct-to-film, a technique where a design is printed onto a special PET film, coated with adhesive powder, and then heat-pressed onto a garment. Unlike traditional screen printing or heat transfer vinyl, DTF allows for detailed, full-color prints without the need for screens or complex cutting. The result is a soft, stretchable print that adheres well to cotton, polyester, blends, and even tricky materials like nylon.
How Does DTF Work?
The DTF process is surprisingly straightforward once you have the right equipment. Here’s a step-by-step breakdown:
- Print the design: Using a DTF printer (usually an Epson or Ricoh modified with pigment inks), you print your design in reverse onto a coated PET film. The film has a special coating that holds the ink and releases it during transfer.
- Apply adhesive powder: While the ink is still wet, you dust the film with a hot-melt adhesive powder. This powder sticks to the wet ink and will later bond the print to the fabric.
- Melt the powder: Pass the film through a curing oven or use a heat gun to melt the powder, creating a sticky layer. This step is crucial to ensure the powder is evenly distributed.
- Heat press: Place the film onto your garment, ink side down, and press with a heat press at around 160°C (320°F) for 15-20 seconds. The adhesive melts and fuses the ink to the fibers.
- Peel: After pressing, peel off the film while it’s still warm (hot peel) or after cooling (cold peel), depending on the film type. Your print is ready!
Why Choose DTF Over Other Methods?
DTF has several compelling advantages that make it a favorite among small business owners and hobbyists:
- Versatility: It works on almost any fabric, including dark and light colors, without needing a white underbase.
- No weeding: Unlike vinyl, there’s no intricate weeding, saving hours on complex designs.
- Soft hand feel: The prints are stretchable and don’t crack easily, making them comfortable for everyday wear.
- Cost-effective for small runs: Setup is minimal, so you can print one-off items or small batches profitably.
- High detail: You can achieve photographic quality with fine details and vibrant colors.
DTF vs. DTG vs. Sublimation: Which Is Best?
It’s easy to confuse DTF with other popular methods. Here’s a quick comparison:
- DTF vs. DTG (direct-to-garment): DTG prints directly onto the shirt, but it requires a pretreatment for dark fabrics and tends to be slower. DTF is more flexible in terms of fabric types and doesn’t need pre-treatment, plus you can print on demand without waiting for the garment to be ready.
- DTF vs. sublimation: Sublimation only works on polyester or light-colored materials, and the print becomes part of the fabric, resulting in a very soft feel. However, DTF works on cotton and blends, giving you more options.
In my experience, DTF offers the best balance of quality, versatility, and ease for most custom apparel businesses.
Essential Equipment and Materials for DTF
To start with DTF, you’ll need:
- DTF printer: You can convert a standard inkjet printer with a DTF kit, or buy a dedicated DTF printer. Popular models include the Epson L805 or XP-15000.
- DTF inks: Use pigment inks specifically formulated for DTF. They have good opacity and wash fastness.
- PET film: Choose a high-quality film with a coating that releases cleanly. There are films for hot and cold peel.
- Adhesive powder: This is usually a polyurethane-based powder that melts at low temperatures. Make sure it’s compatible with your film.
- Heat press: A clamshell or swing-away press with accurate temperature control is essential.
- Curing oven or heat gun: For melting the powder before pressing.
Step-by-Step Guide to Your First DTF Print
Let’s walk through a real example. Suppose you want to print a colorful logo on a black cotton t-shirt.
- Prepare your design: Use graphic software to create your design with a resolution of at least 300 DPI. Mirror the image horizontally because you’ll print it in reverse.
- Print on film: Load the PET film into the printer with the coated side facing up (check your printer’s manual). Print using the correct color profile and high-quality settings.
- Apply powder: Immediately after printing, sprinkle the adhesive powder over the wet ink. Ensure it covers the entire design, then shake off the excess.
- Melt the powder: Use a heat gun at about 150°C (300°F) or a curing oven to melt the powder. You’ll see it turn glossy. Don’t overheat, or you might warp the film.
- Pre-press the garment: For a few seconds, press the shirt to remove moisture and wrinkles.
- Heat press the transfer: Place the film on the shirt, paper (film) side up. Press at 160°C (320°F) with medium pressure for about 15 seconds.
- Peel: If you used hot-peel film, peel immediately with a smooth motion. For cold-peel, wait until cool. Your print should be vibrant and flexible.
Common DTF Mistakes and How to Avoid Them
Even seasoned printers can hit snags. Here are pitfalls I’ve encountered and fixed:
- Adhesive powder not sticking: Ensure the ink is still wet when you apply powder. Also, don’t use too much powder, as it can cause a rough texture.
- Print peeling off after wash: This often happens if the press time is too short or the temperature is too low. Increase press time to 20 seconds or raise the temperature slightly.
- Film wrinkles: Make sure the film is flat and taut on the garment. Use a light tack spray if needed.
- Colors look dull: Check your ink levels and print quality. Also, use a high-quality PET film with good ink absorption.
Tips for Scaling Your DTF Business
Once you’ve mastered the basics, you can expand your production:
- Invest in a roll-to-roll DTF printer: If you’re producing many prints, this system prints continuously and automates powder and curing, greatly increasing efficiency.
- Offer DTF transfers: Instead of printing on garments, you can sell ready-to-press transfers to other businesses or individuals. This expands your market.
- Build a library of designs: Create original designs that you can print on demand, reducing turnaround time.
- Focus on customer education: Many clients don’t understand DTF; explain the benefits and care instructions to ensure satisfaction.
Maintenance and Quality Control
Like any printing process, DTF requires regular maintenance. Clean your printer heads to avoid clogging, store films in a cool, dry place, and keep your heat press calibrated. Regularly test wash your prints to ensure durability. I always wash a sample at 40°C to check for colorfastness and peeling.
Cost Considerations
Starting DTF can be done with under $1,000 if you convert an existing printer and buy a starter kit. However, for professional results, budget for a dedicated DTF printer, which can range from $1,500 to $5,000. Consumables like film and powder cost around $0.50 to $1.00 per transfer, making it cost-effective for small runs.
Frequently Asked Questions
Can DTF prints be used on any fabric?
Yes, DTF works on cotton, polyester, blends, and even denim, canvas, or leather. However, for very stretchy fabrics like spandex, you should use a stretchable adhesive and lower press temperature to avoid cracking.
How do I wash DTF printed garments?
Turn the garment inside out and wash in cold water with mild detergent. Avoid bleach and fabric softeners. Tumble dry on low or hang dry. Following these care instructions will extend the life of the print.
Is DTF printing eco-friendly?
DTF uses pigment inks that are water-based and have low VOC emissions. The film is PET, which can be recycled, though the adhesive residue might complicate recycling. Some companies offer biodegradable films, so research your options.
What is the difference between hot peel and cold peel film?
Hot peel film allows you to remove the film immediately after pressing, saving time. Cold peel film requires waiting for it to cool, which can be safer for intricate designs. Choose based on your workflow and the design complexity.
Can I use a regular inkjet printer for DTF?
Technically, you can convert a printer like the Epson EcoTank, but you must use DTF-specific inks and films. However, dedicated DTF printers have improved ink delivery systems and are more reliable for long-term use.
Conclusion
DTF printing is a versatile, cost-effective method that has opened doors for many entrepreneurs. Whether you’re just starting or looking to expand, understanding the process and avoiding common mistakes will set you up for success. Try it with a simple design, and you’ll see why DTF is becoming the go-to choice for custom apparel. If you have questions, don’t hesitate to reach out in the comments. Happy printing!