When you first hear about DTF printing, it might sound like just another printing acronym. But for anyone who has struggled with vinyl cutting, screen printing setups, or the limitations of DTG on dark garments, DTF (Direct to Film) opens up a new level of creative and commercial possibility. Unlike methods that require specific fabric blends or expensive pre-treatment, this technique lets you print intricate, full-color designs onto a transfer film, then apply them to virtually any textile using a heat press. The result is a soft, stretchable, and remarkably durable print that holds up wash after wash.
In this guide, I will walk you through the entire DTF process, from choosing the right film and ink to troubleshooting common issues. Whether you are a small business owner looking to expand your product line or a hobbyist tired of weeding tiny letters, this article will give you the practical knowledge to get started and avoid costly mistakes.
What Exactly Is DTF Printing?
DTF printing is a digital printing method where your design is printed onto a special PET film using water-based pigment inks. After printing, a thermoplastic powder (often called hot-melt adhesive) is applied to the wet ink. The powder sticks only to the printed areas. Once the excess powder is shaken off, the film is cured in an oven or with a heat gun. The resulting transfer can be stored for months and applied to garments with a heat press.
The key advantage is that DTF does not require the garment to be pre-treated, and it works on 100% cotton, polyester, blends, and even some non-textile surfaces like canvas or leather. This versatility makes it a favorite for print-on-demand shops and custom apparel businesses.
How DTF Differs from DTG and Screen Printing
Direct-to-garment (DTG) printing requires pretreatment and works best on 100% cotton. Screen printing demands separate screens for each color and is cost-effective only for large runs. DTF sits in the middle: no pretreatment, no color limits, and cost-effective even for single pieces. The trade-off is that you need a heat press and a curing oven (or a heat gun) to prepare the transfers.
Step-by-Step DTF Printing Process
Getting a perfect DTF transfer involves several stages. Skipping or rushing any step will show up in the final product. Here is the workflow I follow after years of trial and error.
1. Design Preparation
Start with a high-resolution image (300 DPI or vector). Mirror the design horizontally before printing, because the film is flipped when applied. Ensure your printer's RIP software is set to the correct color profile for DTF inks, usually CMYK plus white. White ink is crucial as it acts as a base for colors on dark garments.
2. Printing onto Film
Load the PET film into your printer. DTF printers typically have a white ink channel that prints a solid white layer behind the color layer. This white layer is what makes the design opaque on dark fabrics. Print quality depends on film quality: cheap films can cause ink spreading or poor powder adhesion. I recommend films with a consistent coating and a thickness around 75 microns.
3. Powder Application
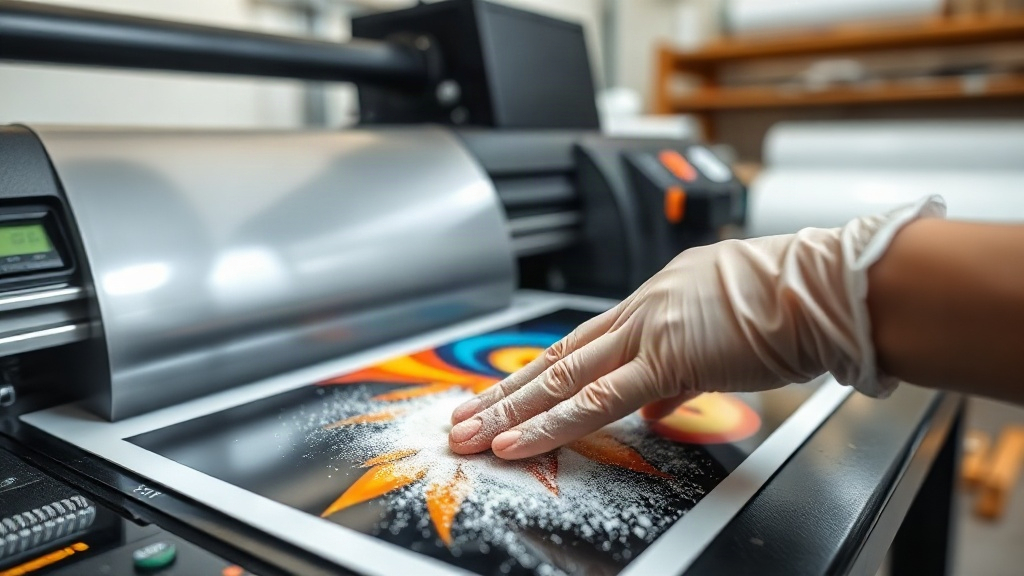
While the ink is still wet, sprinkle the hot-melt powder over the print. You can do this manually or with an automatic powder shaker. The powder should adhere only to the wet ink. Gently shake off the excess and return it to the container for reuse. The goal is a uniform, thin layer of powder.
4. Curing
Curing melts the powder into a flexible adhesive. You can use a dedicated curing oven at 160°C (320°F) for 2-3 minutes, or a heat gun if you are careful. The powder should turn from white to a clear, glossy gel. Under-curing leads to wash-off; over-curing makes the transfer brittle. I always test with a small piece before running a full batch.
5. Transfer Application
Set your heat press to 160°C (320°F) with medium pressure. Place the transfer on the garment, cover with a Teflon sheet or parchment paper, and press for 10-15 seconds. Peel the film off while it is still warm (warm peel) for best results. Some films require cold peel, so check the manufacturer's instructions.
Choosing the Right Materials for DTF
The quality of your DTF output hinges on the materials you use. Here is what to look for.
- Films: Look for double-sided coated PET films designed specifically for DTF. They should resist curling and handle high ink loads without cockling.
- Inks: Use pigment-based DTF inks. They must be compatible with your printhead and provide good color vibrancy and opacity.
- Powder: Choose a hot-melt adhesive powder with a particle size of 80-200 microns. Finer powder gives a softer hand, while coarser powder provides stronger adhesion.
- Garments: While DTF works on many fabrics, tightly woven cotton and poly blends yield the best results. For stretchy fabrics, use a stretchable powder.
Common DTF Problems and How to Fix Them
Even with the right materials, issues can arise. Here are the most frequent problems and their solutions.
Transfer Peels Off After Washing
This usually indicates under-curing or insufficient pressure during application. Increase curing time or temperature, and make sure your heat press applies even pressure. Also, verify that the powder is fully melted.
Colors Look Faded or Dull
Faded colors often mean the white ink layer is too thin or the color profile is off. Increase white ink density in your RIP settings and ensure you are using the correct ICC profile for your ink and film combination.
Film Curls or Jams in Printer
Cheap films or high humidity can cause curling. Store films in a dry environment and consider a film holder or a printer with a straight paper path. Adjusting the platen gap can also help.
Tips for Scaling Up Your DTF Production
Once you master the basics, you might want to increase output. Here are some tips from my own experience.
- Invest in an automatic powder shaker to speed up powder application and reduce waste.
- Use a conveyor oven for consistent curing if you are producing hundreds of transfers daily.
- Keep a log of settings for each fabric type and film brand. Small adjustments make a big difference.
- Store finished transfers in a cool, dry place, away from direct sunlight. They can last up to six months.
Frequently Asked Questions About DTF Printing
Can I use DTF on 100% polyester?
Yes, DTF works on polyester, but you need to lower the heat press temperature to around 140°C (285°F) to avoid scorching or dye migration. Using a low-melt powder also helps.
How do I wash a DTF-printed garment?
Turn the garment inside out and wash in cold water with mild detergent. Avoid fabric softeners and bleach. Tumble dry on low or hang dry. Following these steps will keep the print looking new for 50+ washes.
What is the difference between DTF and DTG?
DTF involves printing on a film and transferring it, while DTG prints directly onto the garment. DTF requires no pretreatment and works on more fabrics, but DTG can be faster for large runs on cotton.
Do I need a special printer for DTF?
You can convert some inkjet printers to DTF, but dedicated DTF printers with white ink circulation systems are more reliable. They prevent white ink from settling and clogging.
How long do DTF transfers last?
When stored properly, unmelted transfers last up to six months. Once applied, the print can last the lifetime of the garment if cared for correctly.
Mastering DTF printing takes practice, but the freedom it offers is worth the effort. You can print any design on any fabric without the constraints of traditional methods. Start with small tests, keep detailed notes, and soon you will be producing professional-quality transfers that impress your customers.